Most mud kitchen DIY guides skip the hard conversations: What happens after rain hits? What about UV damage? Rot? Loose screws? Warped boards? What if your kid decides to climb on it (because they absolutely will)?
Two summers ago, a mom in my neighborhood proudly showed everyone the mud kitchen she had built over the weekend. Pallet wood, a big plastic bowl for a sink, a few hooks, and a slab of plywood. It looked adorable for exactly six days right until the first unexpected monsoon. When I passed her yard a week later, the plywood had curled upward like a potato chip, the pallet frame was softening, and the whole thing leaned to one side like it was exhausted from being outside.
This guide is built for the parent who wants a backyard mud kitchen that looks great on day one and still feels solid three years later. Think real outdoor durability — not Pinterest-pretty for a few weeks, but a mini outdoor kitchen that can handle rainstorms, rough play, and temperature swings without falling apart.
Let’s build one that lasts.
Know Your Climate Before You Build
A friend in humid Florida once used untreated pine for her mud kitchen. It looked brand new for a month, then the mold appeared like it got there overnight. Meanwhile, someone in Arizona told me their mud kitchen faded and cracked in the sun faster than their kids could finish making “mud soup.”
That’s why outdoor projects begin with the same question contractors ask before laying a deck:
What climate are you building for?
If you live somewhere rainy:
You need materials that won’t soak, swell, or rot. Drainage becomes non-negotiable. Even a small flat surface can hold water long enough to destroy a board.
Focus on:
- Cedar or treated lumber
- Sloped countertops
- Gaps for airflow
- Gravel beneath the kitchen
- Mold-resistant sealers
If you live in a hot, dry climate:
UV is the villain here. Weatherproofing means UV blockers and finishes that don’t peel in 100°F heat. Even screws can loosen when wood expands and contracts.
Focus on:
- UV-resistant finish
- Shade placement
- Expansion-friendly joinery
If you live somewhere cold:
Freeze-thaw cycles are brutal. Water gets in, freezes, expands, and cracks both wood and paint.
Focus on:
- Penetrating oil finishes instead of thick paint
- Raised structure to avoid ground dampness
- Tight joinery to reduce water pockets
Understanding your climate before cutting a single board changes everything — materials, finishes, drainage, and even layout.
Materials That Truly Last Outdoors

Think about outdoor furniture you’ve owned. Anything made from the wrong wood? Gone within a year. A mud kitchen gets even more abuse — it gets wet on purpose.
The secret to longevity is choosing materials that behave predictably outside.
Cedar
If your budget allows, this is the gold standard. Naturally rot-resistant, stable in moisture, and lightweight. Cedar doesn’t warp as aggressively and smells great while you build.
Pressure-Treated Lumber
A great option if you seal it well and let it off-gas before letting kids play. It’s strong and designed for ground contact. Most professional outdoor structures use it.
Composite Deck Boards
Perfect for countertops and shelves, not ideal for the main frame. They don’t rot, fade, or crack — but they can bend under heavy load unless supported properly.
Outdoor Plywood or Reclaimed Countertops
Old kitchen countertops made of laminate or stone remnants are surprisingly perfect for the work surface. Outdoor plywood is also strong when sealed well.
Avoid these no matter how cute they look online:
- Interior plywood (swells instantly)
- Untreated pallet wood (soft, bug-prone, splinters fast)
- MDF & particle board (disintegrates when wet)
A mud kitchen built with the right materials feels dramatically different. It’s not wobbly, not spongy, not “temporary.” It becomes an actual outdoor fixture.
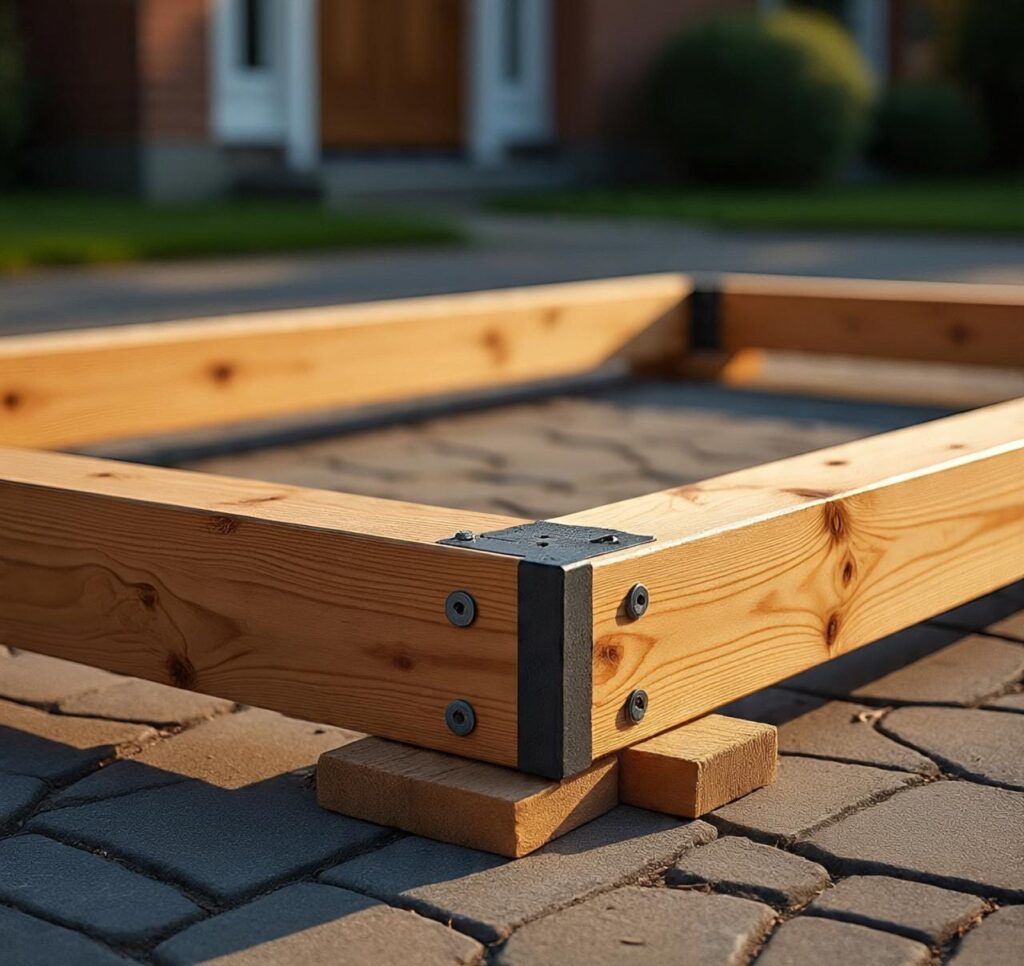
Designing a Sturdy Base That Won’t Shift or Warp
Kids don’t treat mud kitchens like furniture. They treat them like jungle gyms. They lean on them, climb on them, use them as launchpads, counter edges become handrails, and shelves become step stools.
So the base needs to be built like small outdoor cabinetry — not craft wood.
Key stability strategies:
Cross-bracing:
A simple diagonal board on the back makes the entire frame solid. No wobble. No sway.
Corner blocks:
Adding 2×2 blocks inside corners prevents twisting. This trick alone adds years of life.
Leveling feet or pavers:
If the structure sits directly on dirt or grass, moisture travels up the legs like a sponge. Lifting the kitchen slightly off the ground prevents rot.
Pocket-hole joinery or exterior screws:
Prevents separation when the wood swells with weather changes.
This is one of the major differences between a mud kitchen that lasts and one that folds over when your kid decides to climb the counter.
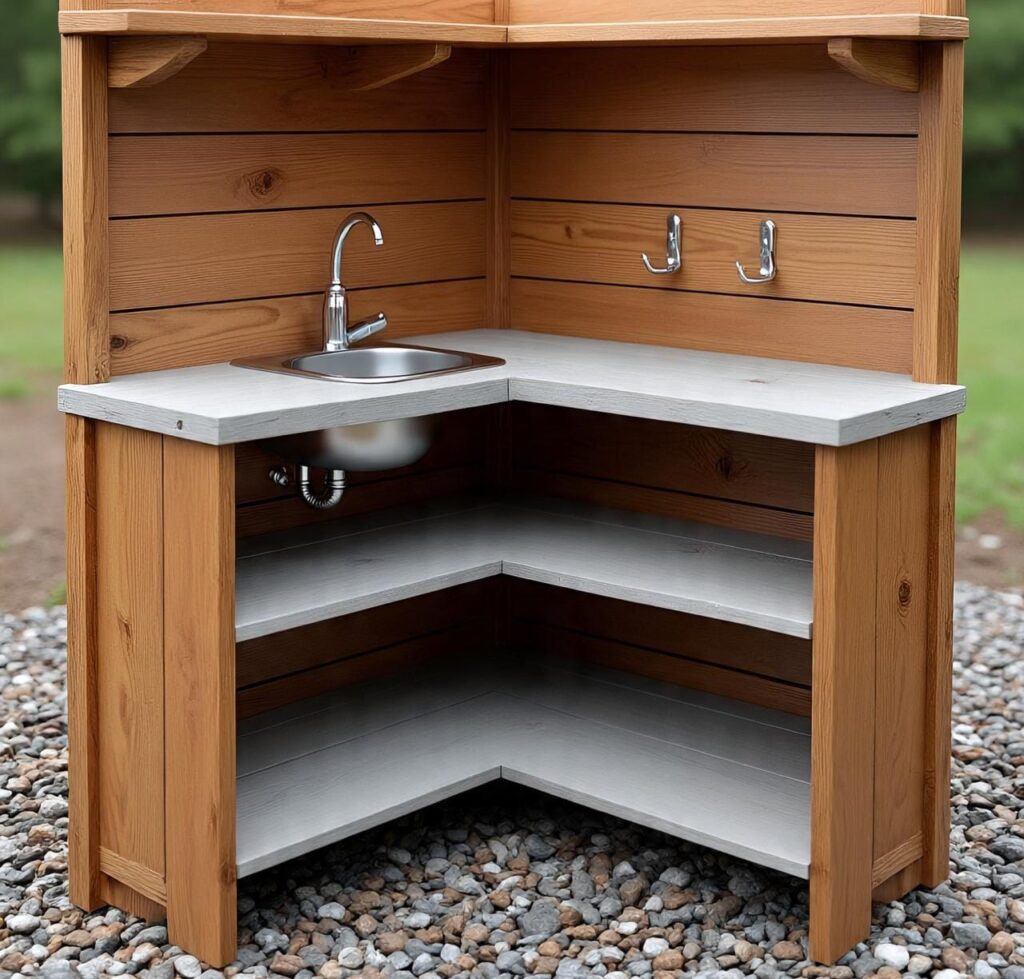
Weatherproof Countertops & Working Surfaces
Countertops fail first every time.
They get the most water, most sun, and most mud. So don’t treat them like a craft surface; treat them like an outdoor workbench.
Strong countertop options:
Sealed cedar slab
Beautiful, durable, long-lasting with a good penetrating finish.
Composite decking boards
No rot, no warping. Excellent for constant water exposure.
Tile over cement board
If you want a true “kitchen” feel this is the method. Use exterior tile adhesive.
Reclaimed stone or laminate
Stone remnants from countertop suppliers are often cheap or free. Laminate works well outdoors if edges are sealed.
Expert tip: Add a slight forward slope
Even a 2–3 mm slope lets water roll off instead of pooling. This tiny detail saves your countertop from long-term damage.
Building a Weather-Resistant Sink & Water System
The sink is the magical part of any mud kitchen and the source of 90% of structural failures when not planned correctly. Water that drains incorrectly, pools behind the kitchen, or soaks into the frame is what ruins most builds.
Water supply options:
Gravity-fed water jug
A 5L tank with a spigot mounted on a shelf. Simple, safe, effective.
Hose splitter + shutoff valve
Lets you run water from the main hose but control flow easily.
Hand pump
A fun upgrade kids love pumping water themselves.
Sink choices:
- Metal mixing bowl (drill a hole for drainage)
- Stainless RV sink (weatherproof and durable)
- Salvaged kitchen sink from a remodeling project
Drainage options:
- A bucket under the sink (classic, functional)
- A gravel trench behind the kitchen
- A mini French drain using PVC and landscape fabric
Proper drainage is half the battle in weatherproofing. No puddles, no rot.
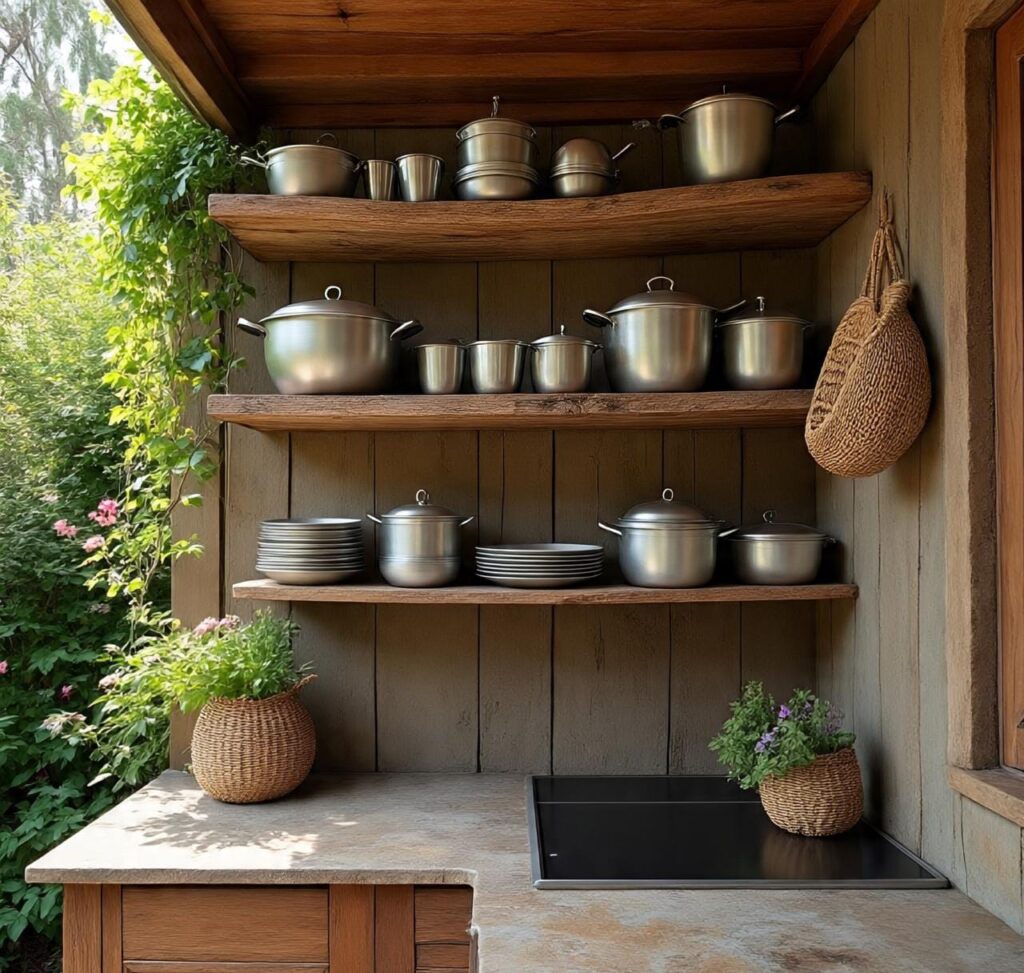
Shelves, Storage & Add-Ons That Stand Up to Weather
Add-ons are where most mud kitchens fail. Cute wooden crates, thin shelves, or interior hardware corrode, loosen, or rot almost immediately outdoors.
Weatherproof storage ideas:
- Composite shelves instead of wood
- Powder-coated metal hooks and rails
- Plastic bins with drainage holes
- Stainless steel baskets for utensils
- Galvanized metal backing for tool hooks
Avoid rope, fabric pockets, or interior-grade metal — they break down too quickly outside.
Sealants, Paints & Finishes
I once saw a dad paint his mud kitchen with interior latex paint because “it was leftover.” It peeled off in sheets within three weeks. Sun and water don’t care about good intentions.
Use outdoor-rated finishes only:
Penetrating oil finishes (great for natural wood)
These soak into the wood and protect from inside-out. Perfect for cedar.
Water-based outdoor sealers (kid-safe option)
Low odor, great for UV protection.
Oil-based exterior sealers (maximum durability)
Excellent water resistance, long cure time.
Expert rules:
- Seal all sides before assembly — even hidden edges.
- Two to three coats minimum for outdoor use.
- Re-seal yearly if you live in rainy or humid climates.
A good finish is like armor; without it, even the best wood loses the fight.
Weatherproofing From the Ground Up
Every long-lasting outdoor structure has one thing in common:
It never sits directly on wet ground.
Ground-prep ideas:
- Pavers or bricks beneath the legs
- Adjustable leveling feet
- Gravel bed to allow drainage
- Mulch area to prevent mud splash against wood
Ventilation matters
Leave small gaps between boards in the back for airflow. Trapped moisture is the enemy.
Pest awareness
Ants, termites, and earwigs love damp wood. Elevation + sealing reduces risk dramatically.
Long-Term Maintenance — The Part People Forget
Even the best build needs occasional love.
Think of it like owning a deck — not a toy.
Monthly checks:
- Tighten loose screws
- Inspect shelves and hinges
- Check drainage flow
- Look for soft spots or mold patches
Seasonal tasks:
- Re-seal high-use areas
- Clean the sink drain
- Sand rough patches
- Check for UV fade and apply UV coat if needed
Five minutes here and there prevents a full rebuild later.
Build Examples
The Small-Yard Family
A skinny, vertical mud kitchen against a fence. Composite shelves, metal hooks, a single bowl sink. Built tall instead of wide. Perfect for a tight backyard.
The Big-Yard Family
A long workstation with two sinks, a side “oven,” and a gravel play zone. Running water from a hose splitter. Built to withstand a whole neighborhood of kids.
The Shady-Yard Family
Used cedar and a gravel base to combat moisture. Wide gaps for airflow. No back panels that trap humidity.
Each layout proves something important:
Weatherproof design is never one-size-fits-all. It’s about adapting to your yard’s reality.
Conclusion
A mud kitchen isn’t just another weekend craft. It’s an outdoor structure exposed to sun, water, soil, mud, bugs, and whatever weather your climate throws at it. Starting with the right materials, the right joinery, smart drainage, and proper finishing means you’re not rebuilding next season.
Remember the neighbor whose mud kitchen collapsed by week two? Yours won’t. Because you’re building intentionally not just for play, but for longevity.
Take the ideas here, adapt them to your yard, and build a mud kitchen that becomes a lasting part of your outdoor space.